- Simple Number Setup
- Simple Call Flow Setup
- Setup Voicemail
- Create a New Extension
- Edit Phone Buttons
- Create a Conference Bridge
- Create a Fax Extension
- Setup e911
- Ordering Phone Numbers
- Porting Phone Numbers
- Simple Call Flow Menu Setup
- Simple Hours Schedule
- Creating Agents
- Design an Auto-attendant
- Hotdesk
- Test e911
- Create a Routing Extension
- Create Cascading Rings
- Create Cascading Ring to Queue
- Adding a Forward
- Limit 800 Spammers
- Find Call Records
- How To…
Simple Call Flow Menu Setup
This tutorial walks you through creating a simple call flow that routes a phone number to a menu with multiple routing options.
Step 1: Create the Call Flow
Step #1. Go to the Call Flows page and click the Add Call Flow button.
Step #2. Enter a name and description for your call flow, then click Add.
Step #3. Click the blue (+) button on the far right of the title bar to add your first command.
Step #4. Select Text to Speech.
Step #5. Enter the following message:
“Thank you for calling ABC Company. If you know your party’s extension, please dial it now. For immediate assistance, press 0. For the company directory, press star.”
Choose a voice and click Done.
Step #6. Click the blue (+) on the Text to Speech line to add another command. Choose Menu & Options, accept the defaults, and press Done.
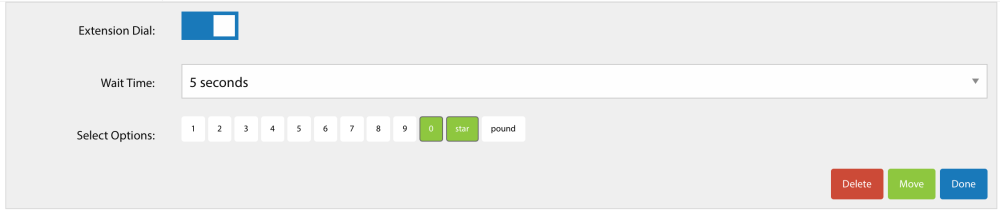
Step #7. Press the blue Menu button to open the Menu Edit panel.
Step #8. Disable all options except 0 and \ (star).
Your options panel should look like this:
Step 2: Configure Menu Actions
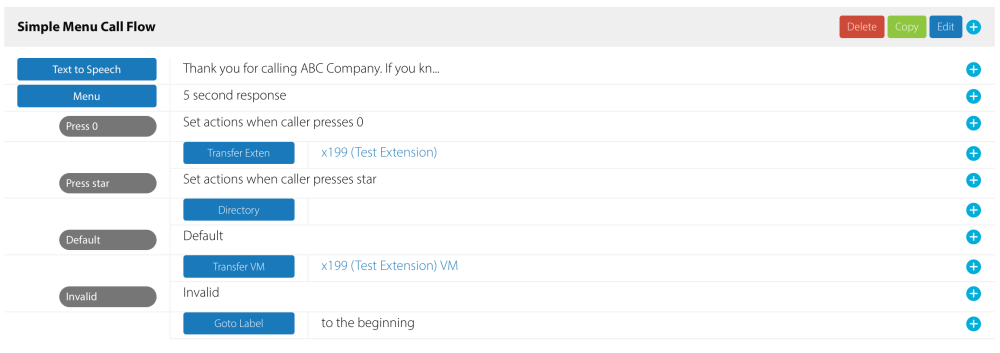
For each option, click the red add action here arrow and assign the appropriate action:
- Press 0 → Add Transfer Extension and set it to the appropriate extension.
- Press \ → Add Transfer to Directory for the dial-by-name directory.
- Default → Add Transfer to Voicemail and select the appropriate mailbox.
- Invalid → Add Go to Label and point it back to the beginning of the call flow.
Step 3: Assign the Call Flow to a Phone Number
Step #9. Go to the Numbers page and select the number you want to configure.
Step #10. Select the Routing tab to open the routing panel.
Step #11. Choose Call Flow from the dropdown, then select the call flow created in the steps above.